13.5.15

The Best PowerPoint Alternatives

PowerPoint has been the king of presentation software for as long as I can remember, but the development of HTML5 and other web languages have provided a type of rich farmland for other presentation tools to form.  Below you will find some of my favorite PowerPoint alternatives for both my use and for students.  Most, but not all, are platform agnostic and/or web based so they should work with any technology you have available.

"Traditional" Presentation Tools

Blendspace

Blendspace isn't a true PowerPoint replacement as much as a PowerPoint (or Slides/Keynote) enhancer.  Blendspace allows you to create a presentation that is a mixture of videos, presentations, pictures, and quizzes that you then push out to the students to progress through at their own pace.  There is also a huge library of pre-created presentations so you don't have to feel like you need to reinvent the wheel.


Google Slides

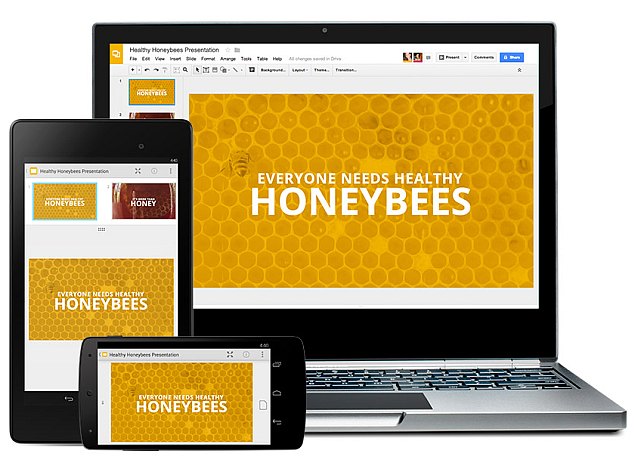
Google Slides is Google's version of PowerPoint (obviously).  There are a lot of strengths to Slides, like the ability to collaborate, and publish as/embed in a website, just to name a few.  But don't confuse it as a direct comparison to PowerPoint.  PowerPoint will let you do clip art and cheesy animated slides to your heart's content, but don't expect the same "jazz handed" showmanship with Slides.  With Slides you will get functionality, versatility, and portability in a way that PowerPoint just can't.


Prezi

I hesitate to put this on the list because it is almost as overused as PowerPoint, but Prezi (when done right) has the ability to be spectacular.  If you've never seen a great Prezi just imagine PowerPoint reimagined by Siegfried and Roy.  It is fluid, active, and, in some cases, show stopping.  Unfortunately, they tend to be less Vegas Strip and more Hee Haw: corny, overused, and nauseating.  With that warning it is best to keep in mind that Prezi is best used when the audience has the ability to interact with the presentation instead of sitting and watching.  When the audience interacts with Prezi they can progress through the presentation either in a "tour" mode or "freestyle".


Haiku Deck

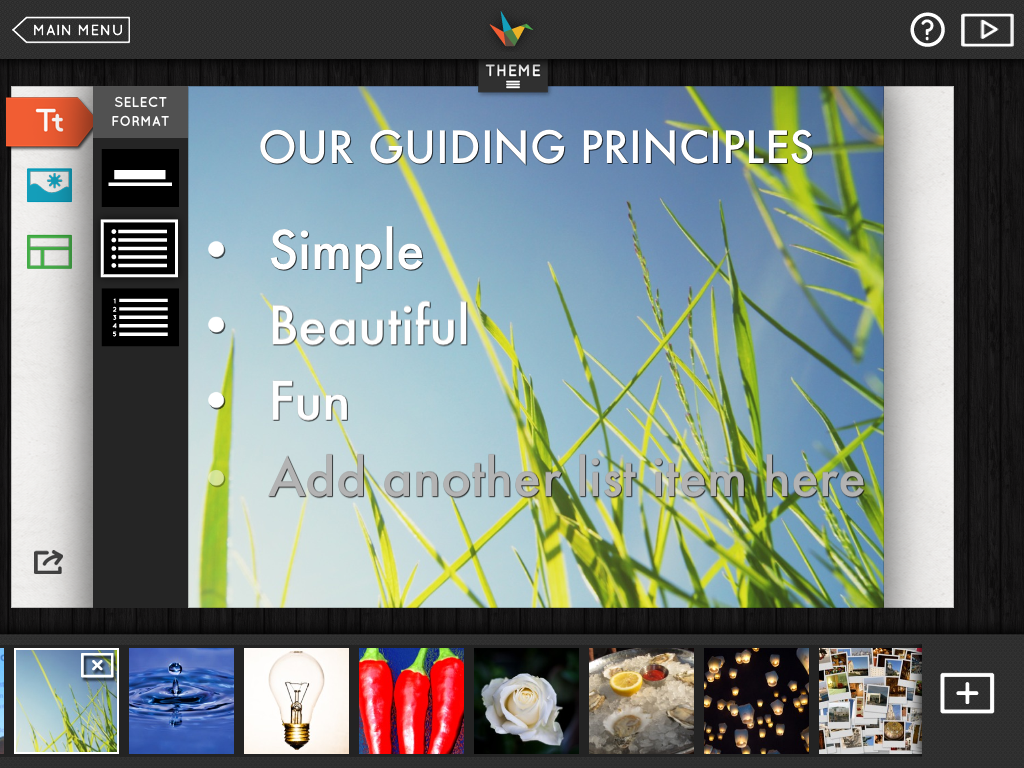
If your goal is Spartan-like simplicity combined with minimalist beauty then Haiku Deck is the presentation tool for you.  The background is the focal point for this presentation tool.  The idea is to use less text and charts (though the charts are pretty cool) so that you spend more time focused on the important parts of the presentations.  This is a great tool for student presentations because it forces them to not read off a screen, and for lectur.


Video Based Presentation Tools


Zaption

Zaption is one of my new favorite presentation.  It utilizes video clips to create a hybrid video lesson/quiz/class discussion.  Insert videos from anywhere, add your questions, and present.  It is that simple and it is always engaging.  You can see a great example of a Zaption here.


Adobe Voice

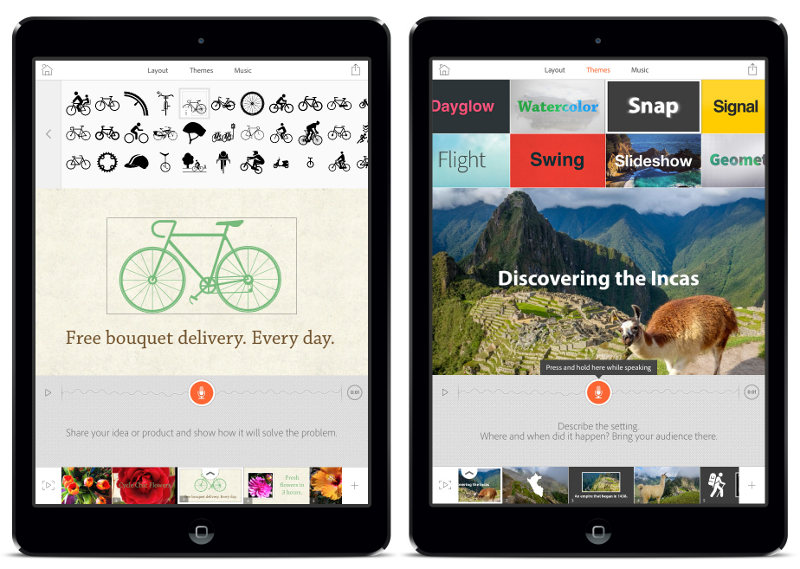
This is one of only two tools on this list that isn't device agnostic.  Adobe Voice only runs on iPads, but it is such a cool tool I had to keep it on this list.  The idea is simple:  your voice is the star of the presentation. If you have a voice like mine you are probably saying no way, but it isn't as bad as it sounds.  You pick a video type and template, drop in some icons or pictures, and ad your narration.  Adobe Voice takes care of the the timing and animation to create a professional quality video in minutes.


Touchcast

Touchcast is another video presentation tool that isn't completely device agnostic.  You have to create the videos on an iPad or with a desktop app, but you can watch the videos on any device through the free Touchcast service.  The great thing about Touchcast is it is more than just a video recorder.  It has built in tools like inlays, teleprompter, annotator, and vApps just to name a few.


"Hacked" Presentation Tools


Blogger

Blogger isn't technically a presentation tool because it actually a blogging platform, but I have used Blogger several times for presentations.  Because it is a blog it will be more text heavy than other tools, but that is a benefit if you want students to go through a presentation at their own pace.  I use Blogger for professional development because it is a great place to warehouse a lot of information that I can pull up for a quick presentation or refer people to if they need help.


Smore

Smore is a great newsletter creation tool but works equally well as a presentation tool for teachers.  With Smore you can create visually stunning presentations with a combination of text, graphics, and videos, slideshows, links, and more.


Tackk

If Haiku Deck married Twitter, their child would be Tackk.  With this tool it is super simple to create beautiful presentations and then share with the world.  From their registered users can comment on and share presentations.

Web Ready Presentation Tools


Piktochart

I love Piktochart.  Piktochart is an infographic creation tool that is simple to use and requires little to know graphic design experience.  You can use either professional pre-designed templates or start from scratch to create infographics fit for flyers, posters, websites, or presentations.  The added ability to add live updating charts and really cool transitions makes this a really powerful presentation tool.


Canva

Canva started off as a web based graphic design tool for novices that wanted to make a polished graphic without the fuss of Photoshop.  Since then Canva has developed into the go to place for web based graphic creation.  It is user friendly, chalk full of helpful guides and templates and even has a presentation tool.  It gives you the beautiful look of Haiku Deck with the flexibility of Piktochart.


Thinglink

Thinglink makes it on this list because when it comes to audience driven presentations Thinglink is the way to go.  Thinglinks consist of a background image that has interactive dots layered over the top of it.  The dots can be links to websites, videos, documents, social media feeds, etc.  It is a great way to let students explore content at their own pace and in their own way.


Update 5/14/2015

I was introduced to two other "PowerPoint Killers" yesterday so I thought I would mention them here.

The first is Emaze.com which is a like a newer and more user friendly version of Prezi.
The second is Slidedog.com which is very similar to Google Slides.  You get more pizzazz, but less Google integration.

3.3.15

Using Infographs in the Classroom


Infographs/infographics are a great way to visualize and organize information.  A quick Google search will show millions of infographs with info ranging from the parts of a hamburger to the impact of plastic waste on marine life.  The reason for the rise in the popularity of infographs is largely due to the fact that they no longer require the knowledge of a graphic design to create.  Sure, you can use Photoshop or Illustrator, but other free web tools, like Google Drawing and Piktochart, make infographics accessible to everyone.

In regards to data or historical facts it is easy to see the value of putting the information in a visual format like infographs.  What is less obvious is how infographs can be used to explain intangible information like analysis or mathematical theorems.  I recently had my students create infographs charting/explaining motifs in the first five chapters of The Great Gatsby.  I gave them four simple guidelines and two means by which to create the infographs.

Guidelines:
  • The infograph must have 5 or more graphical elements (i.e. charts, graphs, pictures, etc.)
  • The infograph must show the progression of the motifs
  • The infograph must cite evidence of the motifs throughout the first 5 chapters
  • The infograph must explain the importance of the motifs
Creation Options:
  • You can create the infographic on butcher paper
  • You can create the infographic using Piktochart or Photoshop
For those of you that don't know Piktochart is a free, web-based infograph creator.  It took a little time for the kids to get accustomed the the user interface, but once they did it was second nature for them.
It was also important to publish the infographs for a real audience.  So they added them to their blog, and I added them to a Thinglink (above) that I tweeted out.

11.2.15

Gmail Labs


One of the most beloved features of Gmail is the Labs (beta versions of possible Gmail features).  Labs are turned off by default because they are experimental features that may or may not make into future releases of Gmail.  Because the lab experiments are, well, experimental, they can act erratically and are sometimes half-baked.  Despite that, I have had good luck over the years with several of the labs.  Here are a few of the labs that I love.

Mark as Read Button:  Adds a button in the top menu bar that allows you to mark an email as read without having to dig into sub menus.  It is a huge time saver.

Canned Response:  I seem to write the same email over and over again to parents.  Canned response makes the process a lot less painful.  You type an email and save it as a canned response.  Next time you need to send out the same email, you just insert the canned response and press send.  You can find a how-to on creating canned responses here.

Apps Search:  There are times that I am tired of swapping between Drive and Gmail to find things.  Was it emailed to me as an attachment, or shared via Drive?  With the Apps Search lab you can use the Gmail search bar to search your Drive as well.  It searches only the titles of items in Drive so it isn't as powerful as the search feature in Drive, but it has saved me a few headaches.

Preview Pane:  I miss the preview pane in Outlook.  In fact, it is about the only thing I miss from Outlook.  This lab brings that feature to Gmail.  You can put your preview pane either below or to the right of the the message list.

Undo Send:  There are times that I send an email only to regret pressing send.  Undo send gives me an option to unsend an email.  The only drawback is that I have to make the decision within 30 seconds because that is all the leeway they give you with this lab.

You can find instructions on how to enable Labs at Google's help site.  If you would like to know more about Gmail labs you can visit the Google Guru or checkout his YouTube channel.

Leave a comment below and let me know what you think and what Labs you love.

Using Filters in Gmail

Gmail is a powerful email client based in part on its ability to apply an infinite number of filters on incoming and outgoing emails.  If you are unfamiliar with the concept of email filters, they are a set of rules you set up that determines what happens to certain emails when they come into your inbox or out of your outbox.

You can create filters in at least three different ways (there may be more, but this is what I have found so far).  The first is from the search bar at the top of the Gmail tab in Chrome (please tell me you are not still using IE).

The search bar looks like this.  Notice the small down arrow to the left of the magnifying glass
The down arrow to the left of the magnifying glass gives you quick access to creating filters.

Here you can set what emails will be filtered.  They can be filtered by incoming/outgoing email address, subject line, key words, or lack of key words.  You can even filter based off of attachments and email size, or combine multiple parameters.  This is useful if you want to filter emails from a certain person on a specific subject.  Once you have put in the parameters select "Create filter with this search" in the lower right corner of the dialogue box.  This will take you to a new window.


This window lets you determine what will happen to emails that match the parameters you set up in the previous window.  A quick run down:

  • Skip the Inbox automatically archives the message so it never makes it to your inbox.
  • Mark as read delivers the email to the inbox but as an already read email.
  • Star it flags the email for easier access via the "Starred" tab on the left hand menu.
  • Apply label will automatically label the email for quicker searching and organization.
  • Forward will auto forward the email to a specified email address.
  • Delete will delete the email.
  • Never send to Spam will white list the email to make sure it doesn't get delivered to the spam.
  • Send canned response will auto reply to the email with a pre written response.  (You have to create it).  You can find directions here.
  • Mark as important will mark email as important.  (Useful if you use the priority inbox).
  • Never mark as important is the inverse of the previous
  • Categorize allows you to sort the emails into predetermined inboxes.  (You must have the inboxes set up before you can categorize emails).
Once you set up your filtering options you can apply the filter to emails currently in your inbox by checking the box at the bottom of the screen.  Now that everything is set up as you want, click "Create Filter" and you are done.  You can now rest assured that your inbox is working for you instead of against you.

The second way to create filters is through the settings cog on the right side of the screen.  Click on the Cog>Settings>Filters.  From their you can create and edit filters to your heart's content.

You can create a new filter by selecting "Create a new filter" at the bottom of the screen.
The third is from within an email itself.  To the right of the reply button there is a down arrow.  Click on it and then select "filter messages like this".  Follow the same steps as above.


Bonus Tip:  If you don't want to give out your email address because of fear of spam, throw in a couple of periods into the first part of the email address.  Gmail doesn't recognize the periods so they still get delivered to you.  You can then create a filter to automatically trash any email that comes to that period ridden email address.

10.2.15

Back in the Game

So, its been awhile.  Keeping up a blog can be daunting when you feel like every post should be some profound testament to who knows what.  After some sage advice and time to reflect, I have come to realize shorter and more frequent post will give rise to more timely and useful information/advice for those who so graciously read this blog.

I wax too much, time to get to the good stuff!

I just started to using Inbox, a new take on Gmail.  It automatically categorizes emails, grouping them together by content, and encouraging a tidy inbox by marking all emails as "done" or setting reminders to take a look at the email later.  Check out the link above and the video below for more info.  Right now, it seems that Inbox only works on personal Gmail accounts (or maybe just needs to be enabled by your GAFE admin) and is by invite only.  If you would like an invite, leave me a comment and I'll see if I can hook you up.


17.11.14

What to do with Those Kid's Blasted Cell Phones

This year, my school officially adopted a BYOD policy for the students.  This is a great step forward, but in a culture that sees cell phones as enemies to education it, lets say, hasn't been openly embraced.  We have gone from the days of "only drug dealers have cell phones at school" to today, when, "only the Amish don't bring their phones to school."  Unfortunately, many teachers, myself included, haven't been quick to acknowledge the fact that cell phones are really powerful educational tools.  They can be used for simple tasks like doing calculations and referencing dictionaries and thesauri, to more complicated activities like research, interactive activities, QR scavenger hunts, augmented reality, and educational games.  Now that is not to say that phones aren't still a distraction.  They are a tool, like a textbook or whiteboard, that are valuable but open to abuse (I'm thinking about the numerous sketches and terse remarks scribbled in the margins of textbooks).  Today I want to share a few cell phone centric tools that you can use in the classroom, plus a few ways to manage cell phones when not used in class.

The Tools

In an attempt to be as open as possible for everyone, I want to focus on tools that are device agnostic--that is to say they can be used on any device with an internet connection.  These first four tools would be considered Learner Response Systems (LRS). LRS are not new.  The first systems were simple remotes you gave to each student that connected to some sort of hub.  You give a question, the students answer it with their remote, and answers were tallied by the hub--Think final voting round of AFV, but for teachers.  These LRS were expensive and tied to a specific device.  The new crop of LRS are web based, free (or mostly free), and device agnostic.


Socrative

Socrative is my main tool for LRS.  It is easy to set up and allows a wide range of options for creating and administering quizzes. I use it from everything from exit tickets to complete test.  Instant results are sent without running to the workroom to run scantrons. Plus, it is harder for students to cheat because it can randomize question and answer choices.  I also like that I can download and print nicely formatted copies of the test for those that don't have access to a device.  Below is a rather exhaustive video of the features of Socrative.  


Kahoot

When I want something more competitive and/or fun I opt for Kahoot.  Kahoot is the same idea as Socrative (a LRS utilizing cell phones) but throughs in a competitive aspect that makes the process more fun for the kids.  Students compete against each other for points, and the addition of music and videos (and sometimes music videos) adds an exciting dynamic.  The downside to Kahoot is that you are limited to the length of questions, number of answer choices, and there isn't a way to create a quick question.  Take a look at the video below for a rundown of how to use Kahoot.


ExitTicket

ExitTicket is a new app for me.  It does many of the same things as Socrative and Kahoot, but allows you to track student's progress in more detail and over time.  That alone makes it a valuable resource.  The short video below gives you an introduction to the app or you can check out their videos at exitticket.org.


Plickers

Sometimes you end up being the only one with a device, or you want something more kinesthetic.  Plickers is the LRS app that can deliver in both of those situations.  Instead of each student having the device, you as the teacher, have the device, and the students have printed individualized QR codes.  I haven't had a chance yet to try it out in class, but I can see it as fun alternative to the typical LRS.  Below is an introductory video for Plickers.


The Other Tools

Google Forms, when combined with Flubaroo, is another great alternative for giving assessments. It is in no way a LRS, or entertaining, but it gets the job done in a straight-forward and painless way.  To get started, create a quiz in Google Form.  Next, share the link (not the form itself) with your students using a URL shortener like Tinyurl or Bitly.  Once the students have taken the assessment open up the response spreadsheet, add the Flubaroo Add-on, and grade away.  The directional video below should get you started.


I have never used these two systems, and honestly, don't know much about them, but I have heard quite a bit of chatter about both lately, so I thought I would add them in.


Classroom Management When Not Using the Device

I'm not going to insult you with statements regarding 'the key to keeping kids off their phones keeps the kids authentically engaged with innovative'.. and yada-yada-yada.  We all know and do that, and yet still have kids who use their phones when they shouldn't . Seeing this, we would like to throw the phones against a wall (or maybe that's just me at times).  So what do we do then?  Below are some ideas, simple ideas I might add, that teachers are using to control phones when not in use.

  • Charging Stations- One thing that I know for sure that entice kids to willingly give up their devices is free charging.  A few powerstrips or an expensive charging station will give the kids a reason to put their phones down and keep the out of reach when not needed.  
  • Shoe hangers-This one can be controversial in the terms that you may not feel comfortable having students put their phones in "your possession" in a shoe hanger, but it keeps it out of their reach.  
  • Tupperware- Place small "phone size" tupperware (preferably disposable) on each student desk.  It is helpful to attach the containers to the desk using double-sided tape or velcro.  At the beginning of class the kids put their phones in the container and seal the lid.  They cannot break the seal on the lid without effort and noise, thus keeping the device out of reach.
  • Facedown method- This one is super simple and doesn't require you to purchase anything.  When the student sits down they are to place their phone face down on the corner of their desk.  If they touch it, you take it.  For groups, have them stack the phones, one on top of the other, in the center of the group.
If you have other ideas, please leave them in the comment section below.

It's been fun.  Until next time, peace.

-Cody

23.10.14

If I Could Only Say 15 Things About Google Chrome


I grew up using Internet Explorer because.  When I started using Macs I switched to Safari, and I have to admit up to that point--which was not that long ago-- I believed web browsers were just a piece of software that let you look at things on the internet.  It wasn't until I started using Chrome a couple of years ago that I realized just how useful a browser could be.  There is a plethora of browsers available.  IE, Safari, Firefox, Opera, Dolphin, but Chrome has proven to be the more robust, quicker, and more secure than the other offerings out there.  There are people that have written articles and blog posts on all the little (and big) tips and tricks of Chrome.  Instead, I would like to opine 15 reasons why I love Chrome.

15.  It is Fast

The title for fastest browser rotates between the major browsers, but Chrome spends more time at the top of the speed charts than the other browsers.

14. Chrome Profiles

As far as I know this a feature unique to Chrome.  You can create multiple profiles within Chrome.  This allows multiple users of the same computer to have a unique browser experience by allowing each user profile to have unique extensions, apps, history, bookmarks ,and settings.  You create a new profile in the settings menu.

13. Apps

This is Chrome's unique take on shortcuts.  Websites are repackaged and curated in the Chrome Web Store.  Once an app is added to your Chrome profile you can access the apps from the app shortcut in the bookmark bar or from a third party extension like Blackmenu.  You can find a list of my favorite educational apps here.

12. Incognito Window

Private browsing is nothing new, but I love Chrome's version of the private browser because it is quick to implement and quick to disable.  Simply open an Incognito window, accomplish what you need to accomplish, and close the window.  All browser history, cookies, applets, and whatnot are deleted when the browser is closed.

11. Shortcuts

Shortcuts can be created with any browser but when shortcuts are created with Chrome they take on the personality of an application.  Shortcuts lose the Omnibox, tabs, and extension/bookmark bars, leaving instead a nice, clean window.  It is a small but nice touch.  Create shortcut by navigating to the page you want to create a shortcut for then go to settings>tools>create desktop shortcut.

10. The Omnibox

The Omnibox is what Google calls Chrome's unified URL and search bar.  You can of course search and type in addresses, but its functionality goes well beyond that.  For example, you can type in simple math equations and get an instant answer.  You can also search your Gmail, calendar, and Drive accounts, as well as look up movie times and flights.  Check out this blog for a more robust list of Omnibox tricks.

9. Quick History List

View a history of sites you have visited on a particular tab by clicking and holding the back arrow.  This is a super quick way of searching your recent history without opening the history tab in settings.

8. Manipulating Tabs and Windows

You can do all kinds of crazy things with the tabs and windows in Chrome.  By clicking and drag a tab you can rearrange the order of tabs or drag the tab down to a new window.  You can drag multiple tabs together by holding shift and selecting the tabs you want to move.  Again they can be rearranged as a group or moved together into a new window.  You can combine windows by dragging the tabs from one window next to the tabs of another window.  I find this helpful to organize projects I'm working on, to minimize the number of open tabs, and to prevent myself from accidentally closing tabs I need open.

7. Startup Modes

Chrome allows the user to specify what it does when you open the browser.  You are given three options:  open a new tab, pick up where you left off, or open a specific page or set of pages.  This is great if you always open the same few pages every day or, like me, want to pick up right where I left off the day before.  To access this setting go the setting menu, select Settings>Show advanced settings>On startup.

6. The Tab Options

Right clicking on a tab brings up all kinds of useful options like opening a new tab, reloading the current tab, duplicating a tab, reopen an recently closed tab, and my favorites: close tabs, bookmark all tabs into a folder, and pin the tab.  The tab menu give you three options for closing tabs.  You can close the selected tab, close every tab but select tab, or close every tab to the right of the current tab.  If you are working on a project that includes several tabs that you will need access to again later, you can bookmark the entire set of tabs into a bookmark folder with one action by right clicking on any tab and selecting bookmark all tabs.  The most used feature from the tab menu actually gets its own spot on the list.  It is...

5. Pinned Tabs

Pinned tabs are a unique set of tabs that have a couple of special features.  Pinned tabs, when pinned, will move to the the far left of the tab bar, shrink in size, and will not close while pinned.  I use this to keep my most important or most often used tabs open and safe from accidental closing.  To pin a tab right click on the tab and select Pin tab.

4. Bookmarks

Bookmarking or favoriting functionality is a stalwart of web browsers and has been for over a decade, but I like Chrome's bookmarking feature because of its ease, customization, and cross device accessibility.  Creating a bookmark in Chrome is as easy as clicking the star in the right of the Omnibox, naming the bookmark, and saving.  I can then customize the bookmarks by sorting them into folders, or making them a simple icon by deleting the text and leaving just the favicon.  Plus you can access your Chrome bookmarks from any device in which you have Chrome installed.  I can access bookmarks created on my desktop from my iPad or iPhone and vice versa.

3. History

For better or worse Google keeps track of everything we do.  The better part of that is that they keep the browser history of all your devices for as long as you will allow them.  By going to the settings menu and opening the history window you can see the browser history for every device you have signed into.  This is great for when you find a great website at home but need it at school the next day.

2. Recovering Recently Closed Tabs

Also, because Google keeps track of your browsing history you can recover Chrome tabs you closed and later realized you need to reopen.  Again this is not isolated to just the computer you are currently on.  You can open recently closed tabs from any device you have logged into.  To access this feature go to the setting menu and select Recent Tabs.

1. Extension

And finally, the driving force behind my love affair with Chrome.  Extensions are the rocket fuel and street mods (I know that is a conglomeration of two different metaphors) of the beast that is Chrome.  They allow for the functionality of Chrome to extend well beyond the confines of its programming.  I have another blog post that goes more in depth in regards to extensions, but I do want to highlight my favorites.

  • Blackmenu - the one stop quick access menu for all things Google.
  • Clipular - Screenshot extraordinaire.
  • Checker Plus for Gmail - Quick access to Gmail that is almost as robust as the Google service itself.
  • Save to Google Drive - The quickest way to save things you find on the web to Drive.
  • Goo.gl URL Shortner - Create short URLs and QR codes with a single click of a button.
  • LastPass - The award-winning champion of password keepers.
  • AdBlocker Plus - Blocks almost all of the annoying ads you find on websites.
  • Turn Off the Light - A great way to block unwanted content on Youtube.
  • Read&Write for Google - This has been a life saver when it comes to reading accommodations for students.
  • Clearly - Great for quickly preparing something to print without the annoying pictures, links, and advertisements, or just a way to read something in a less distracting format.

So there you have it.  Fifteen reasons why I love Chrome.  That multi-colored, ball shaped hole in my heart has been filled.  May you find some joy in Chrome yourself.

Alright, so I can't help myself; one more thing I love about Chrome:  the experiments.  By typing chrome://flags you can access all the experimental things that Google is baking up in Chrome before it is officially released.  Some of the experiments "may bite" as the warning says but many are well worth the danger of being a first adopter.  

I'm seriously done this time,

Cody